 Support
Updated :
Support
Updated :
BASIC CONCEPTS
There are 3 main camera modes in MSFS:
Cockpit view
- The cockpit view is the main camera mode of MSFS and is the primary means to interact with the plane
- While in cockpit view, you can control the camera translations, rotations and zoom factor from any camera position
- Rotations
- “Cockpit look left” (Left shift + left)
- “Cockpit look right” (Left shift + right)
- “Cockpit look up” (Left shift + up)
- “Cockpit look down” (Left shift + down)
- Or you can press & hold the right mouse button and move the mouse to control the eyepoint
- Translations
- “Decrease cockpit view height” (down)
- “Increase cockpit view height” (up)
- “Translate cockpit view forward” (Right alt + up)
- “Translate cockpit view backward” (Right alt + down)
- “Translate cockpit view left” (Right alt + left)
- “Translate cockpit view right” (Right alt + right)
- Zoom
- “Zoom cockpit view” (Mouse wheel up)
- “Unzoom cockpit view” (Mouse wheel down)
- Rotations
- The cockpit view has four (4) default camera positions from the Pilot’s perspective:
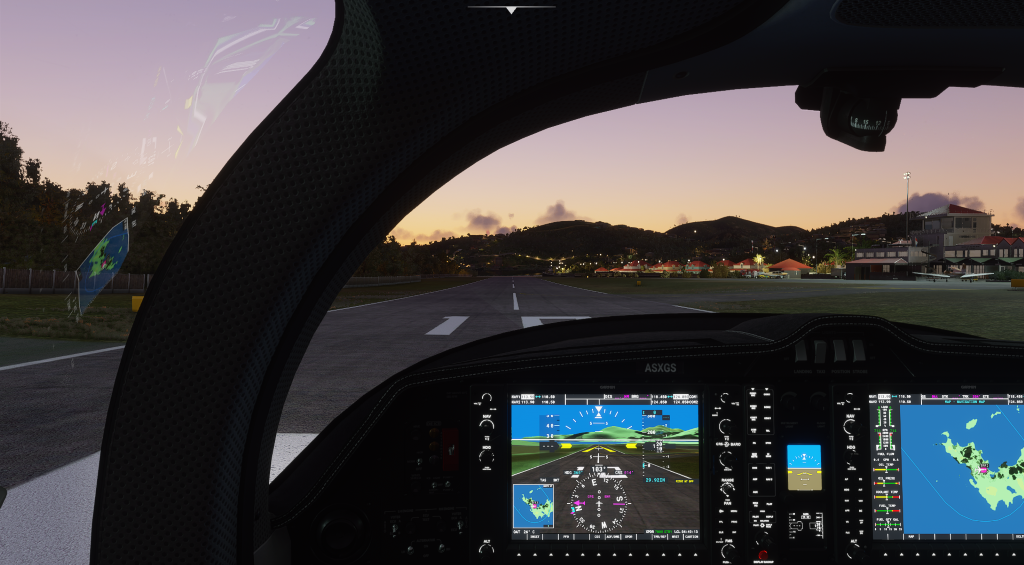
- The VFR position defaults to the pilot seat and offers a good view of both the main instruments and the exterior.
- It can be activated using the “Toggle VFR Cockpit mode” command (F10 by default)
- The IFR position defaults to the pilot seat and is more focused on the plane’s instruments
- It can be activated using the “Toggle IFR Cockpit mode” command (F9 by default)
- The Landing position defaults to the pilot seat and offers a good view of the runway.
- It can be activated using the “Toggle Landing Cockpit mode” command (F11 by default)
- The Copilot position defaults to the copilot seat, in a VFR style position
- It can be activated using the “Toggle Copilot view” (unmapped by default)
- Additional notes:
- Using the “Reset camera” shortcut (F by default) will always replace the camera to the last used Pilot’s view
- You can cycle through the VFR, IFR & Landing Pilots view using the “Next Pilot position” & “Previous Pilot Position” commands
- The VFR position defaults to the pilot seat and offers a good view of both the main instruments and the exterior.
- The cockpit view also has different instrument views
- Instrument views are preset camera positions focused on each instrument panel of a given plane
- You can access them using their default shortcuts, “Toggle instrument view [1, 2, 3…]” (left ctrl + [1,2,3…] by default)
- You can also cycle through them using “Next instrument view” and “Previous instrument view” (by default, A or left shift + A)
- The cockpit view has ten (10) Custom views slots
- At any time, you can save the current camera position to a Custom view slot, using “Save custom camera [0, 1, 2…]” (by default, left ctrl + left alt + [1, 2, 3…])
- You can then reload this custom view using “Load custom camera [0, 1, 2…]” (by default, left alt + [1, 2, 3…])
- Finally, the Cockpit view has a set of 8 Quickviews
- A Quickview allows a pilot to quickly orient the camera preset direction from the pilot seat
- The Quickviews are:
- “Cockpit Quickview Up” (left ctrl + Up), +30° pitch
- “Cockpit Quickview Rear” (left ctrl + Down), +160° yaw
- “Cockpit Quickview Right” (left ctrl + Right), +90° yaw
- “Cockpit Quickview Left” (left ctrl + Left), -90° yaw
- “Cockpit Quickview 45° left” (unmapped by default)
- “Cockpit Quickview 120° left” (unmapped by default)
- “Cockpit Quickview 45° right” (unmapped by default)
- “Cockpit Quickview 120° right” (unmapped by default)
- You can cycle through the Quickviews using “Cockpit Quickview cycle” (Q by default)
External view
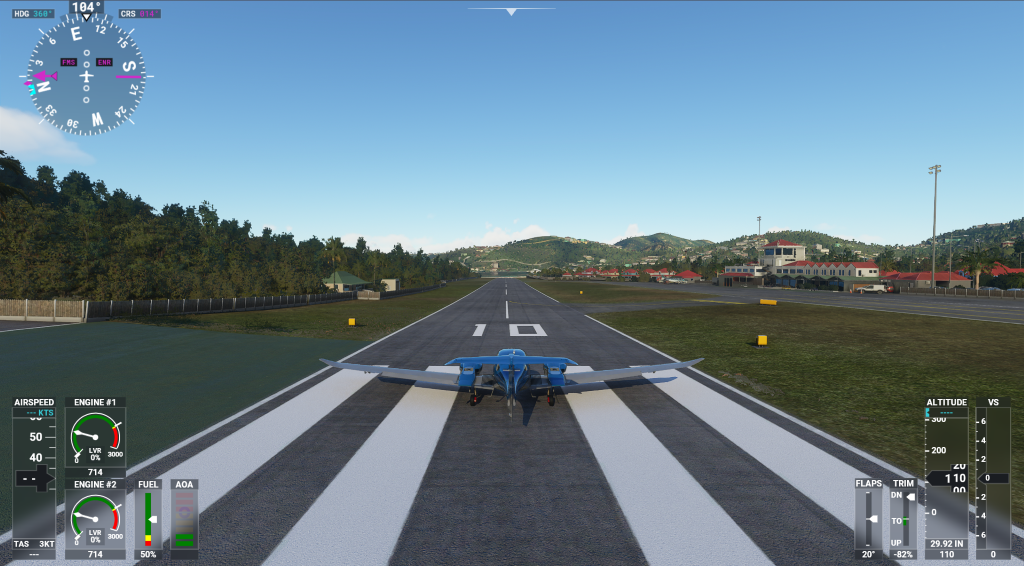
- The external view controls the plane from a 3rd person perspective
- You can freely rotate and zoom the camera around the plane
- Rotations
- “External view left” (unmapped by default)
- “External view right” (unmapped by default)
- “External view up” (unmapped by default)
- “External view down” (unmapped by default)
- Or you can press & hold the right mouse button and move the mouse to control the eyepoint
- Zoom
- “Zoom external view” (Mouse wheel up)
- “Unzoom external view” (Mouse wheel down)
- Rotations
- Like the cockpit view, the external view has a set of Quickviews
- A Quickviews allows a pilot to quickly orient the camera preset direction around the plane
- The Quickviews are:
- “External Quickview Top” (left ctrl + Up), top down view
- “External Quickview Rear” (left ctrl + Down), rear front view
- “External Quickview Right” (left ctrl + Right), right plane profile
- “External Quickview Left” (left ctrl + Left), left plane profile
- “External Quickview 45° left” (unmapped by default)
- “External Quickview 120° left” (unmapped by default)
- “External Quickview 45° right” (unmapped by default)
- “External Quickview 120° right” (unmapped by default)
- From the external view, you can still access the set of cockpit based instruments views using their dedicated shortcuts (ctrl + [1,2,3…]).
- At the moment, you cannot save custom views in External view
- Showcase views
- The showcase view provides a way to manipulate external camera positions to either capture screenshots and videos, or to enjoy the scenery.
- The “Toggle Drone” input (Insert by default) allows you to activate and de-activate the Showcase mode
- The showcase view provides a way to manipulate external camera positions to either capture screenshots and videos, or to enjoy the scenery.
- They are split into two (2) different categories: the Fixed camera and the Drone camera
- The Fixed camera are a set of wide angle views positioned on the plane’s fuselage
- “Toggle Fixed camera [1, 2, 3…]” (left ctrl + left shift + [1, 2, 3…]
- You can also cycle through them using “Next Fixed camera” (A) and “Previous Fixed camera” (left shift + A)
- The Drone camera is a highly customizable free moving camera
- You can freely control its position and rotations
- Translations
- “Translate Drone Backward” (S by default)
- Translate Drone Forward” (W by default)
- “Translate Drone Down” (F by default)
- “Translate Drone Up” (R by default)
- “Translate Drone Left” (A by default)
- “Translate Drone Right” (D by default)
- Rotations
- “Pitch Drone Down” (Numpad 2 by default)
- “Pitch Drone Up” (Numpad 8 by default)
- “Roll Drone Right” (Numpad 9 by default)
- “Roll Drone Left” (Numpad 7 by default)
- “Yaw Drone Right” (Numpad 6 by default)
- “Yaw Drone Left” (Numpad 4 by default)
- Translations
- You can freely control its position and rotations
- You can set its speed, both for translations and rotations
- “Increase Drone Translation Speed” (F6 by default)
- “Decrease Drone Translation Speed” (F5 by default)
- “Increase Drone Rotation Speed” (F8 by default)
- “Decrease Drone Rotation Speed” (F7 by default)
- You can control its depth of field
- “Toggle Drone Depth of Field” (F1 by default)
- “Toggle Foreground Blur” (left ctrl + F1)
- “Toggle Drone Autofocus” (F4 by default)
- “Increase Drone Depth of Field” (F3 by default)
- “Decrease Drone Depth of Field” (F2 by default)
- You can control its exposure
- “Toggle Drone Auto Exposure” (left ctrl + F4 by default)
- “Increase Drone Exposure” (left ctrl + F3 by default)
- “Decrease Drone Exposure” (left ctrl + F2 by default)
- Its “Follow mode” allows it to move freely in the plane frame of reference
- “Toggle Drone Follow Mode” (Tab by default)
- Its “Lock mode” sets and locks the Drone camera onto the plane.
- “Toggle Drone Lock Mode” (left ctrl + Tab by default)
- The “Follow mode” and the “Lock mode” are not linked, meaning you can activate or de-activeate them independently
- You can change the target of the Drone camera (other players, landmarks…)
- “Attach Drone to Next Target” (left ctrl + Page up)
- “Attach Drone to Previous Target” (left ctrl + Page down)
- “Lock Drone to Next Target” (T)
- “Lock Drone to Previous Target” (left shift + T)
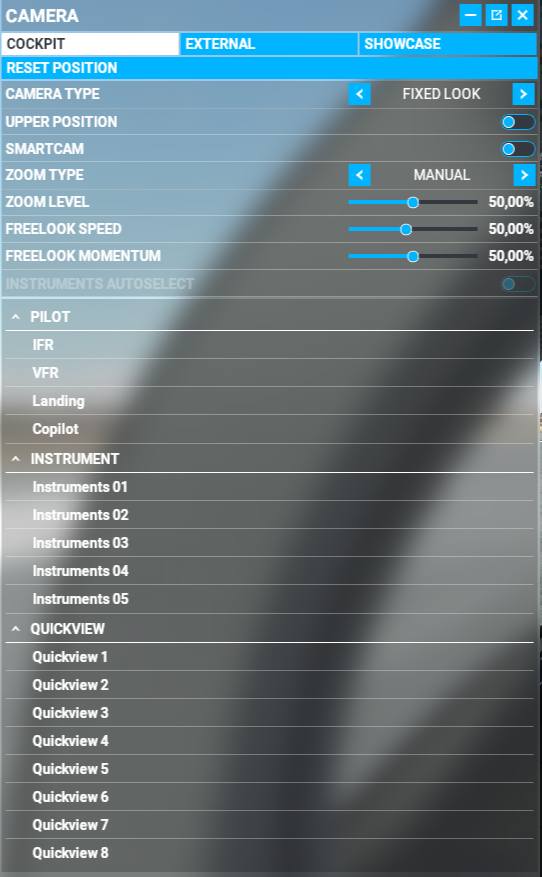
USER INTERFACE
A summary of the camera controls and modes can be found in the camera panel located in the in-flight toolbar

FREQUENTLY ASKED QUESTIONS
- What is the Smartcam and how can I use it ?
- The Smartcam is a feature accessible from the Cockpit and External views
- “Toggle Smart Camera” (S by default)
- It allows the pilot to focus the camera on the closest point of interest, or a selected one
- “Set Custom SmartCam Target” (T by default)
- “Next SmartCam Target” (left ctrl + Page Up by default)
- “Previous SmartCam Target” (left ctrl + Page Down by default)
- The Smartcam is a feature accessible from the Cockpit and External views
- There are several points of interest available for the Smartcam
- Navigation
- Navigation points of interest are dynamic and contextually updated, depending on the current flight state.
- On the ground, it will follow each taxiway intersection.
- On the runway, before taking off, it will target the climbing slope.
- After take off, it will target the next waypoint if a flight plan is active, or the closest airport if there’s no flight plan
- During approach, it’s updated to the designated runway threshold
- During final, it is updated to the end of the runway
- Navigation
- Tourism
- The Smartcam can target landmarks, fauna, etc.
- Multiplayer
- The Smartcam can target other players
- Activities
- The Smartcam can target the current mission objective
- What are the lockable versions of the camera controls?
- The lockable camera inputs are activated when their corresponding “lock” control is triggered.
- The pilot can, for example, change the behavior of the mouse from controlling the cursor to controlling the eyepoint when the right mouse button is held.
- Most of the camera controls have a lockable version, allowing for a fine customization of the interaction model.
- Can I map the camera controls to my joystick POV hat?
- Yes, you first have to remove the Quickviews from your joystick POV hat (please refer to the Inputs FAQ for more details)
- Then, you have to set the following commands to each direction of you POV hat:
- COCKPIT LOOK LEFT
- COCKPIT LOOK RIGHT
- COCKPIT LOOK UP
- COCKPIT LOOK DOWN
- COCKPIT LOOK UP LEFT
- COCKPIT LOOK UP RIGHT
- COCKPIT LOOK DOWN LEFT
- COCKPIT LOOK DOWN RIGHT
- The camera system in MSFS is very versatile and most of the camera controls can be set on any button or axis.
- How do I remove the HUD from external view?
- Disable Options > General > Camera > Chase Camera > Display Instrument HUD
- Are TrackIR devices supported by MSFS?
- Yes. It is important tolaunch the TrackIR software before launching the simulation and make sure it is up to date (software version & game list)
- The head tracking device controls add to the camera system, meaning you can still interact with all the camera as you want while wearing the head tracker.
- While in Drone camera, is there a way to control the plane at the same time?
- Yes, you can use the “Toggle plane control” (keyboard C by default) command while in the Drone camera to take control of the plane.
Comments